

With the lights set up and working, next I wanted to add some monitoring of different systems in the van. The first one I thought I'd tackle was monitoring the solar power by interfacing with my charge controller.
Items needed to set this up:
- Renogy Rover Charge Controller: I have the 30Aversion shown here, but this setup should work with any of charge controllers in this series
- USB Serial Dongle: For serial communication from the Raspberry Pi to the Charge Controller
- DB9 to RJ12 adapter: The charge controller uses a non-standard serial pinout, so this adapter is needed to connect to it
- RJ12 Cable: To connect from the adapter to the Charge Controller
In order for the Raspberry Pi to communicate with the Renogy charge controller, we need a USB to RJ12
serial cable. Renogy used to include this cable with their charge controllers, but since introducing their bluetooth
module, they stopped making it. So instead we'll have to make our own!
The three components of the cable are the USB serial dongle which allows the raspberry pi to
communicate in the correct protocol for the charge controller, then the DB9 to RJ12 adapter and the RJ12 cable
which allows you to connect to the Renogy charge controller with the correct pin mapping.
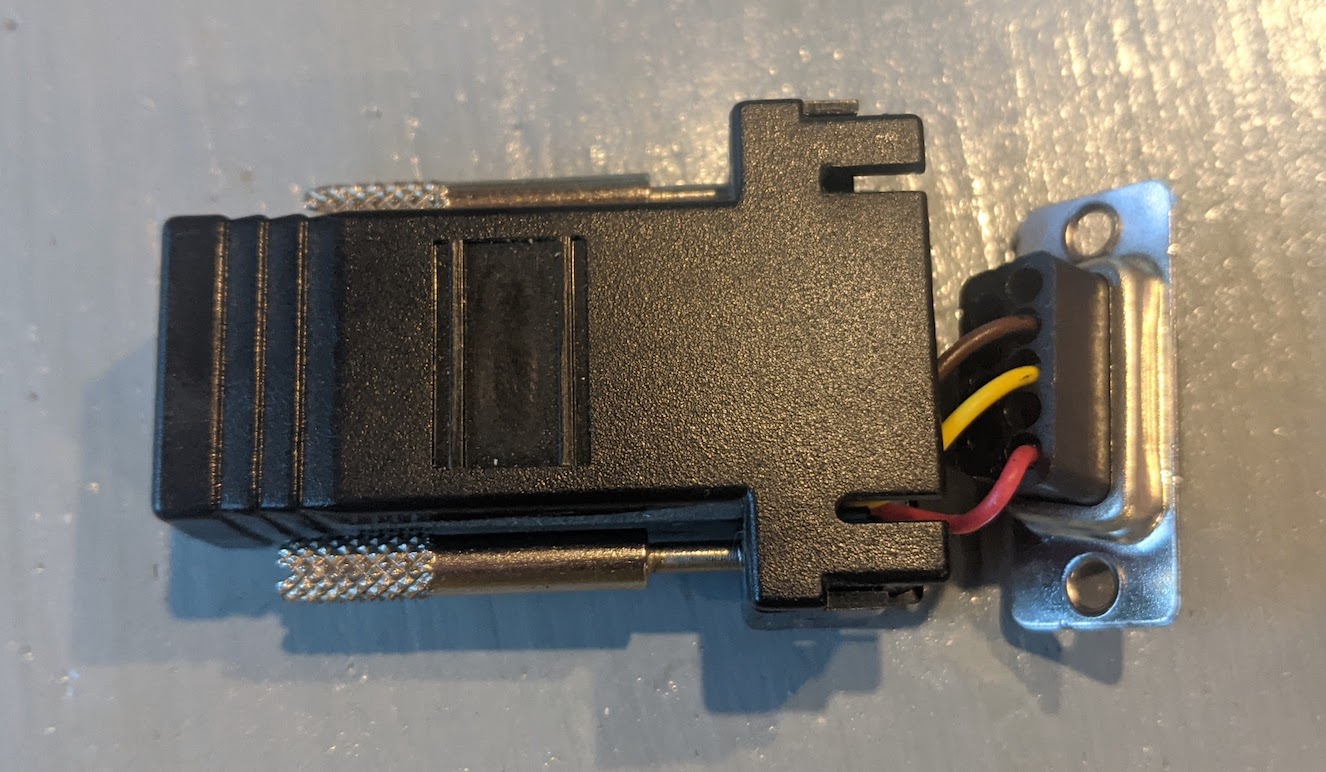
The Renogy Charge Controller uses a non-standard pinout which is why we will be using the modular adapter kit.
This kit allows you to use any pin mapping you'd like when going from RJ12 to DB9, but requires a bit of work to get set up correctly.
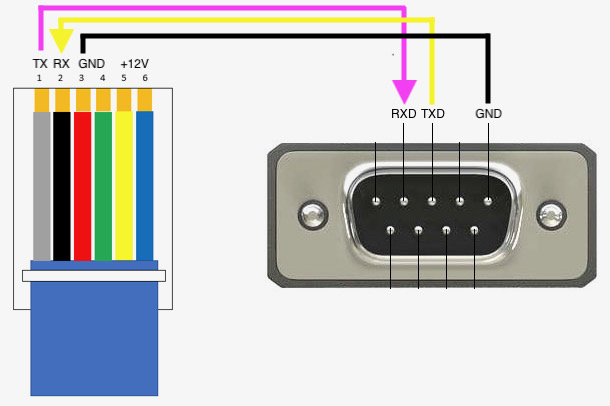
The pin mapping of the RJ12 connector for the Renogy charge controller is: TX/RX/GND/GND/+12V/+12V. On
the USB serial dongle, pin 2 is RXD, pin 3 is TXD, and pin 5 is GND. We need to connect the RJ12 TX to the serial dongle RXD and the RJ12 RX to the serial dongle TXD. We then need to also connect GND. This is done using the DB9 to RJ12 adapter as shown below.
Once the cable is made, I recommend connecting it to the Renogy charge controller, then using a multimeter to test the pin voltages before connecting it to the serial dongle. TX to GND and TX to RX should both be about 5V. Make sure you didn't accidentally connect the 12V pins or you could fry the serial dongle and possibly even the raspberry pi.
With the cable now connected between the raspberry pi and the charge controller, we now need some
software to read registers from the charge controller. First find the name of the USB serial dongle on your
raspberry pi with:
pi@raspberrypi:~ $ ls /dev/*USB*
/dev/ttyUSB0
/dev/ttyUSB0
Now we can start writing a python program. Luckily, someone has already written a library called
Solarshed that handles reading data from the charge controller. More info on this library here:
You can install Solarshed with:
pip install solarshed
I have a basic program posted here that reads the current solar power from the charge controller every
second using Solarshed and publishes the data to the MQTT server running on the Raspberry Pi:
If your serial dongle is at a different address, you can change it on this line:
controller = RenogyRover('/dev/ttyUSB0', 1)
You can also edit the script to add monitoring of more than just power or other features.
In order to have this script always running, we will turn it into a systemd service. Create a new file
with:
sudo nano /lib/systemd/system/solar_mqqt.service
And add the following to the file changing the ExecStart path to the path of your python script:
[Unit]
Description=Solar MQTT
After=multi-user.target
[Service]
Type=idle
ExecStart=/usr/bin/python3 /home/pi/python/solar/solar_mqtt.py
WorkingDirectory=/home/pi
User=pi
Restart=on-failure
RestartSec=5s
[Install]
WantedBy=multi-user.target
Description=Solar MQTT
After=multi-user.target
[Service]
Type=idle
ExecStart=/usr/bin/python3 /home/pi/python/solar/solar_mqtt.py
WorkingDirectory=/home/pi
User=pi
Restart=on-failure
RestartSec=5s
[Install]
WantedBy=multi-user.target
Save the file, then you can enable the service with:
sudo systemctl daemon-reload
sudo systemctl enable solar_mqqt.service
sudo systemctl enable solar_mqqt.service
To check that the service is running:
sudo systemctl status solar_mqtt.service
The final step is to add this new sensor to Home Assistant. In Home Assistant, go to Configuration -> Integrations and add the MQTT integration if you don't have it already. Now go to your configuration.yaml file in your homeassistant directory and add the following sensor:
sensor:
- platform: mqtt
state_topic: "van/solar/power"
name: 'Solar Power'
unit_of_measurement: 'W'
value_template: '{{ value_json.power }}'
- platform: mqtt
state_topic: "van/solar/power"
name: 'Solar Power'
unit_of_measurement: 'W'
value_template: '{{ value_json.power }}'
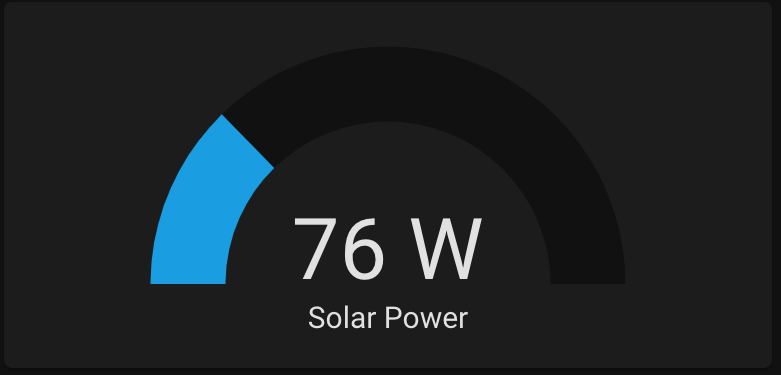
Restart Home Assistant and you should now be able to add the sensor to your dashboard!